Mastering Image Orientation: Tips for Easy Rotating Photos on Windows 11

Mastering Image Orientation: Tips for Easy Rotating Photos on Windows 11
Quick Links
Key Takeaways
- To rotate an image, open File Explorer, right-click the image, and select “Rotate Right” or “Rotate Left.”
- To rotate an image with the Photos app, open the image with the Photos app, select Edit Image, and choose a rotation option.
- To rotate a photo with Paint, open the photo with Paint, select the Rotate option, and choose how you want to rotate the picture.
Whether you want to fix your image’s orientation or you think a photo will look better if it’s rotated a specific way, it’s quick and easy to rotate pictures on Windows 11. We’ll show you how to do that with your PC’s built-in apps.
From File Explorer
The quickest way to rotate an image to the left or the right is by using File Explorer. You can use this utility to rotate multiple pictures at once as well.
To rotate an image with File Explorer, launch a File Explorer window by pressing Windows+E and find your image. Right-click the image and select “Rotate Right” or “Rotate Left,” depending on how you want to rotate the image.
To rotate multiple pictures at once, select all the images to rotate before choosing a rotation option.
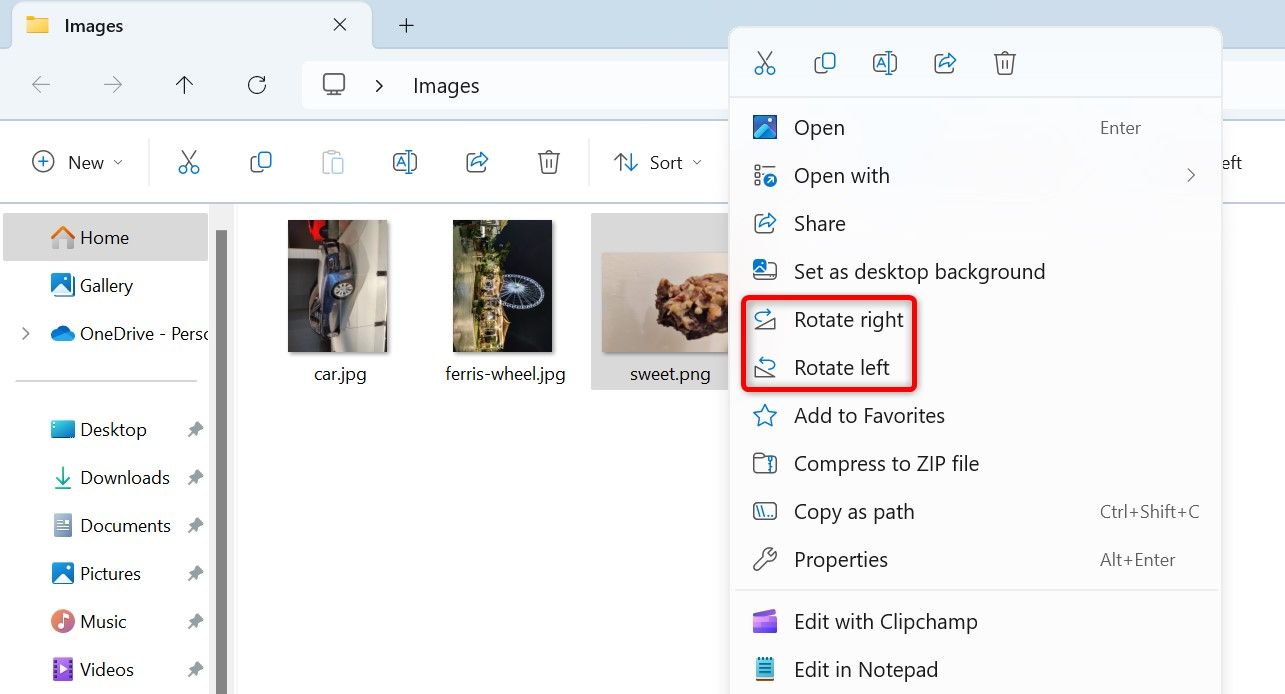
If you make a mistake rotating the image, right-click the image again and choose the opposite rotation option. This will bring the image back to its default orientation.
Rotate a Photo With the Photos App
Like File Explorer, Windows 11’s Photos app lets you rotate images 90 degrees clockwise or counterclockwise.
To rotate a photo with the Photos app, open File Explorer and locate your image. Right-click the image and select Open With > Photos. If Photos is the default image viewer on your PC , simply double-click the image to open it with the app.
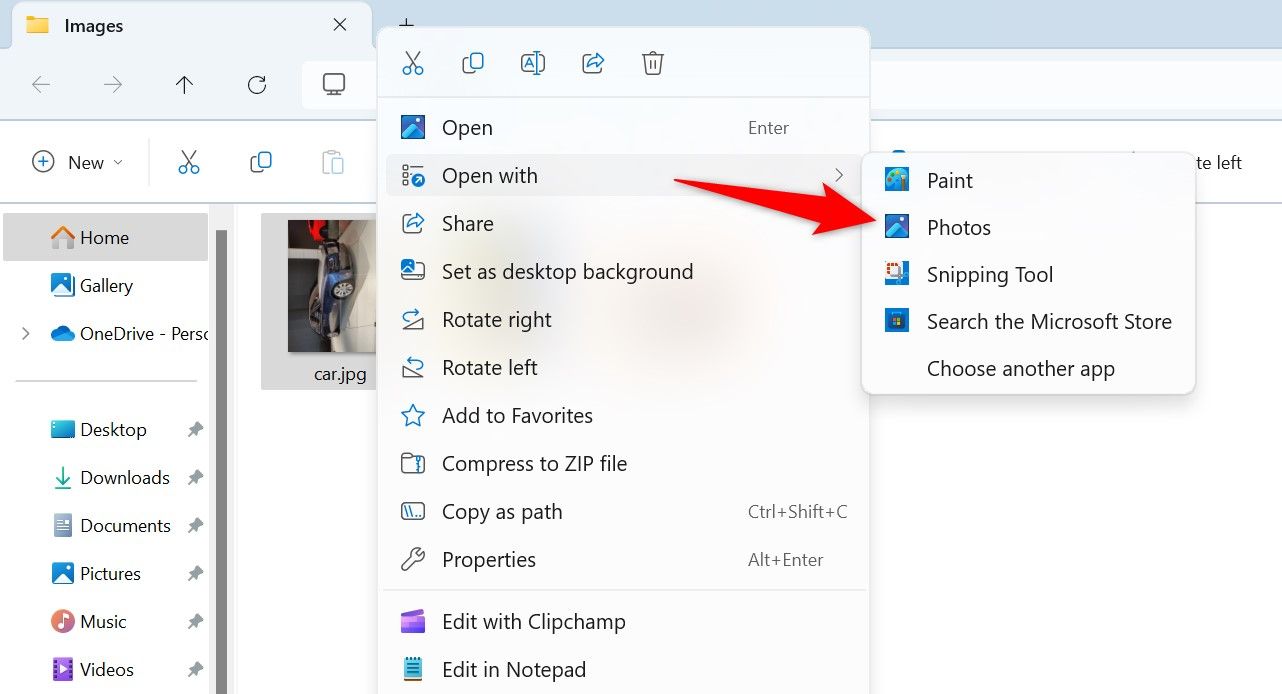
In Photos, from the top toolbar, select Edit Image (the first icon). Alternatively, press Ctrl+E.

You’re now ready to edit the image.
To rotate the image 90 degrees clockwise, in the bottom-left corner, click the icon that has an arrow going right. To rotate the image 90 degrees counterclockwise, click the arrow going left.
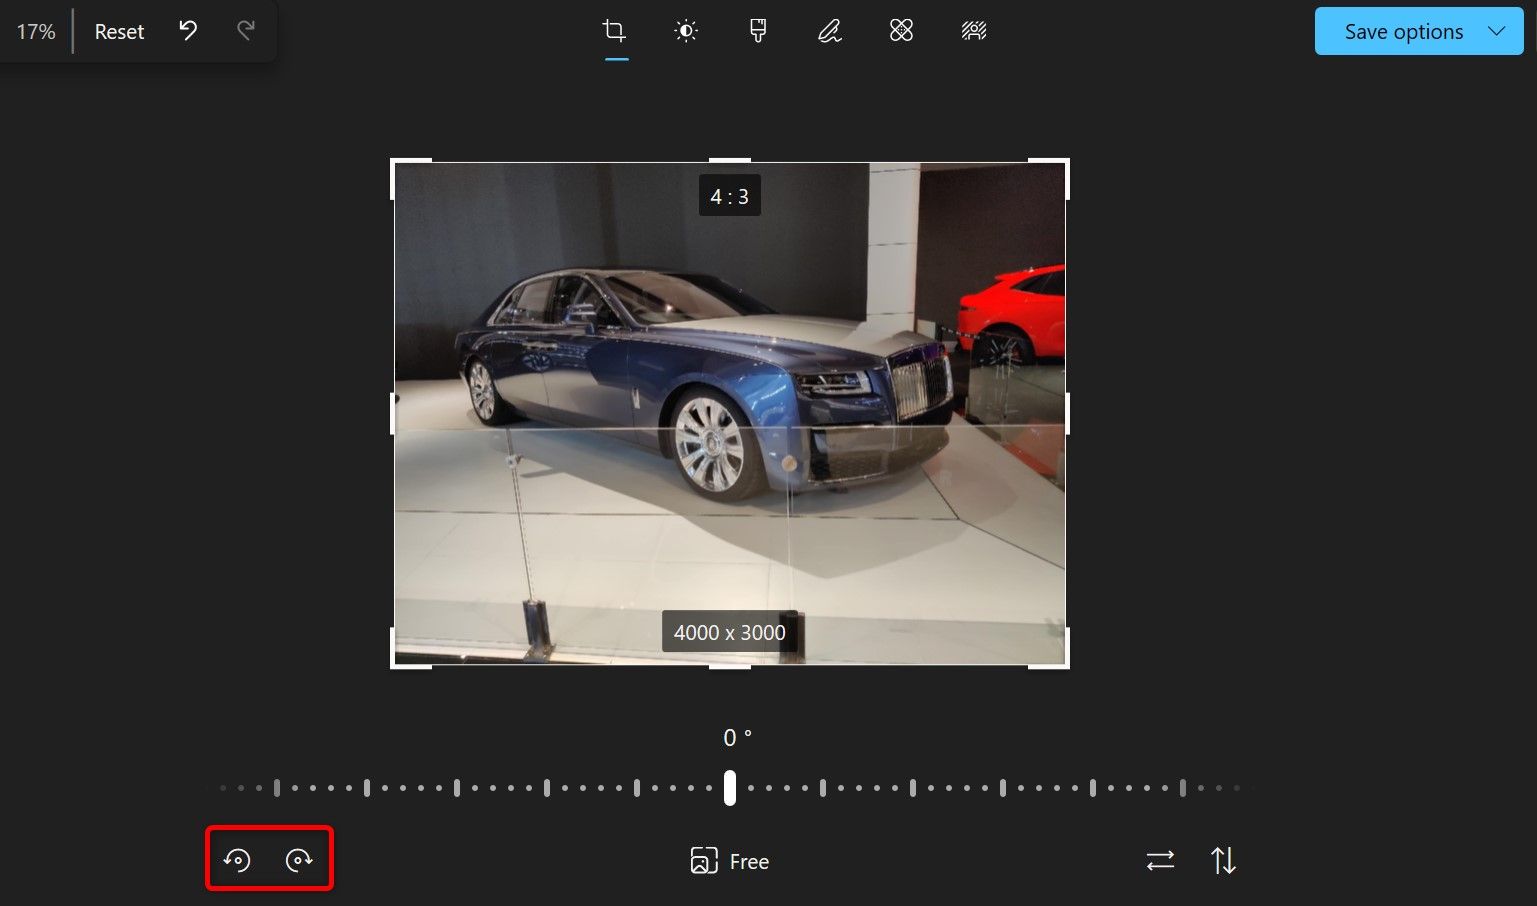
Feel free to click the rotation option multiple times until the desired result is achieved.
When you want to save the image, in the top-right corner, click “Save Options.” Then, choose one of three options:
- Save as Copy: This option doesn’t overwrite the original image but creates a rotated copy of the original image.
- Save: This option overwrites the original image with the rotated one.
- Copy to Clipboard: This option saves the rotated image to the Windows clipboard. You can then paste this image in any supported app.
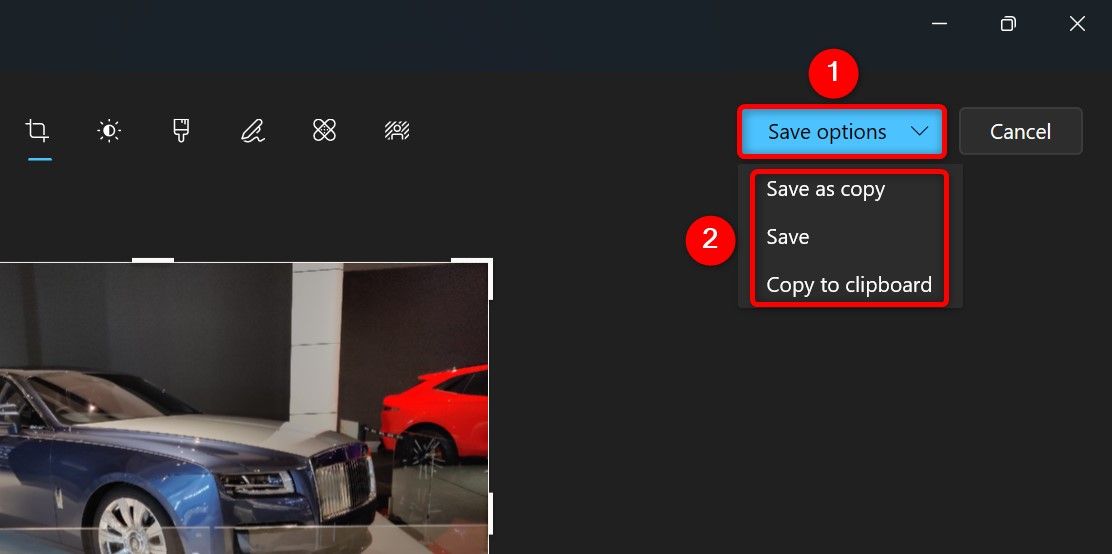
And that’s all.
Using the Paint App
Paint allows you to rotate images 90 degrees as well as 180 degrees. To use it, launch File Explorer and find your image. Right-click the image and select Open With > Paint.
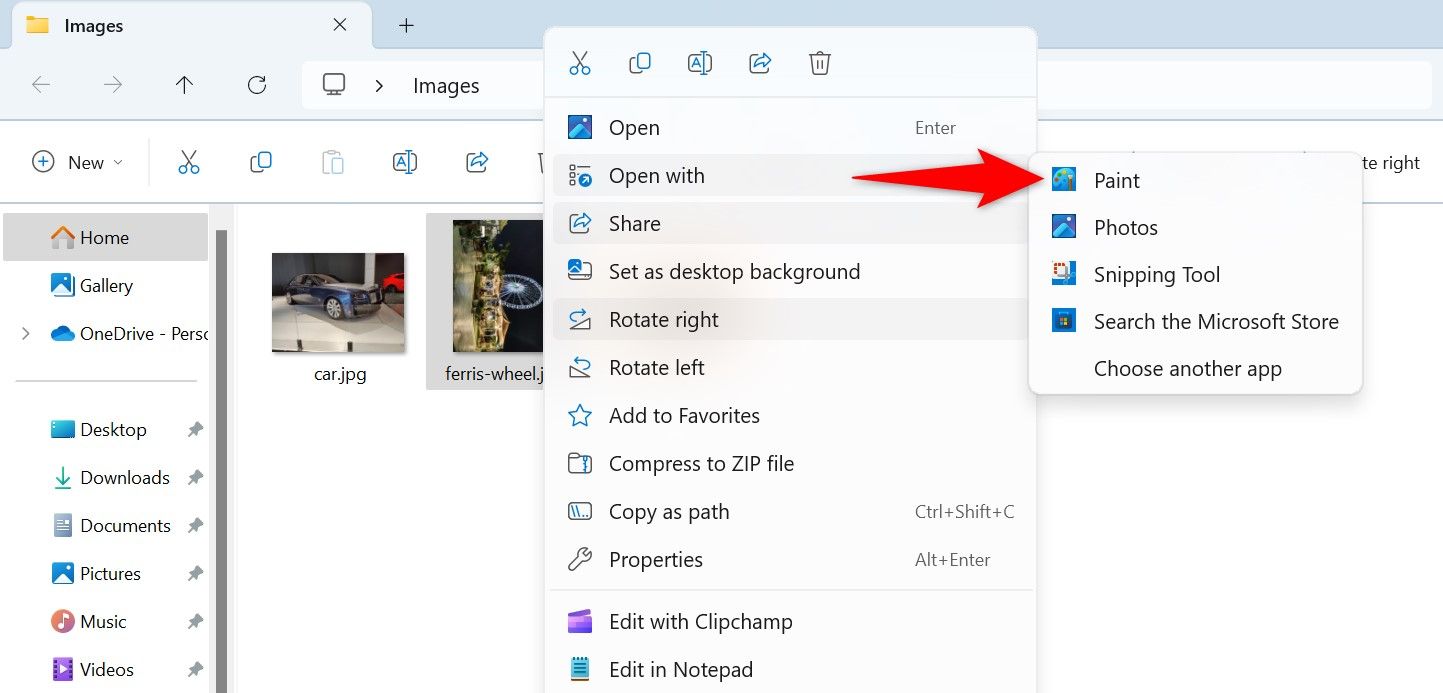
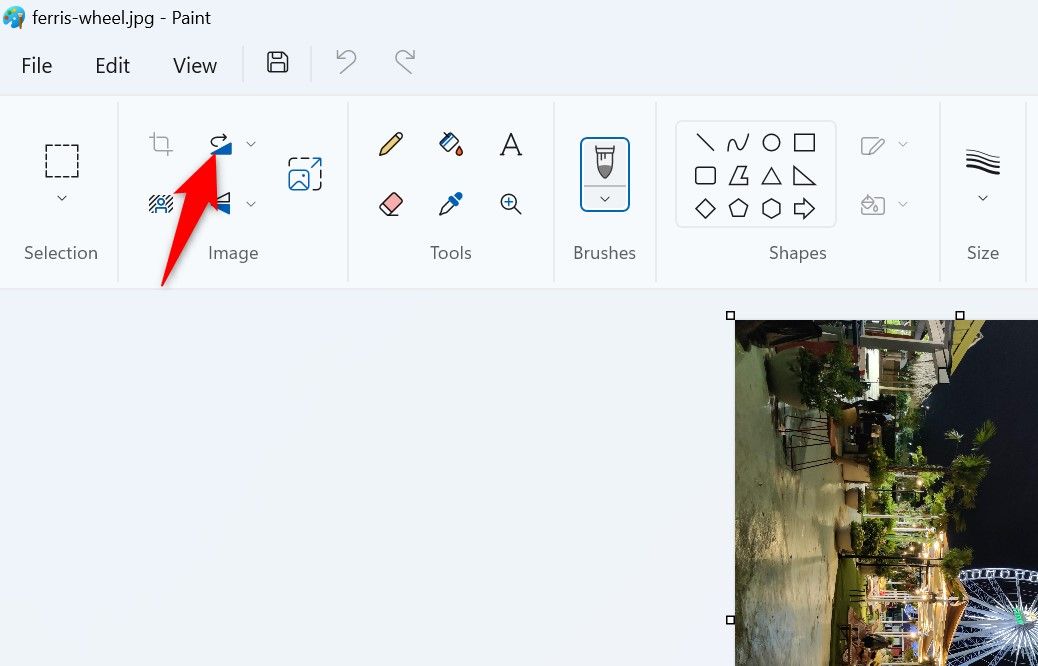
In Paint, from the Image section at the top, select Rotate (a right-arrow icon).
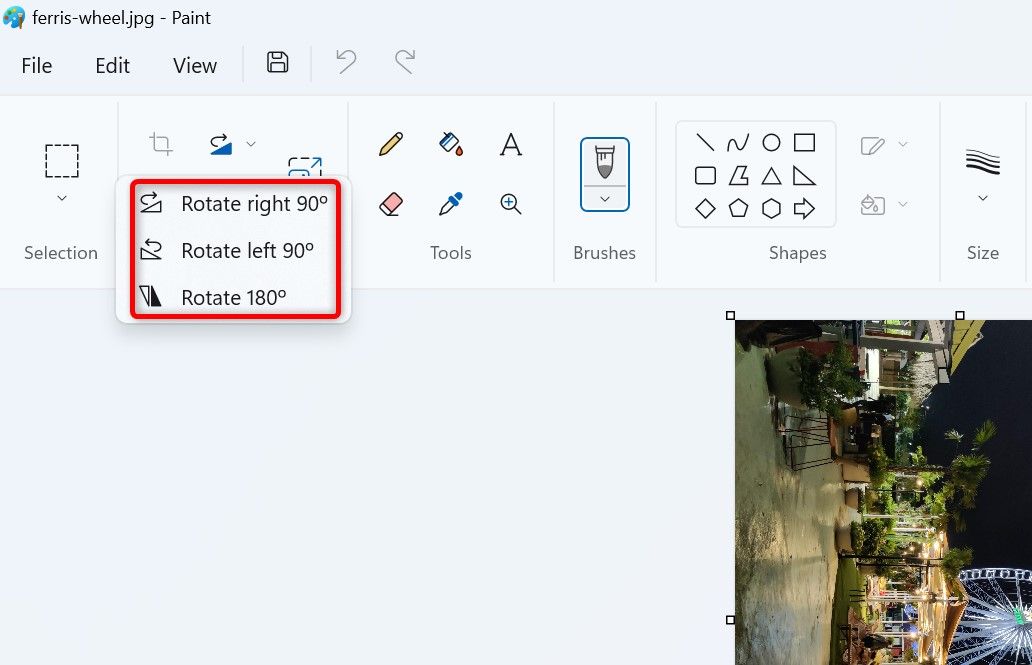
From the displayed options, choose how you want to rotate the image. Your options are: “Rotate Right 90°,” “Rotate Left 90°,” and “Rotate 180°.”
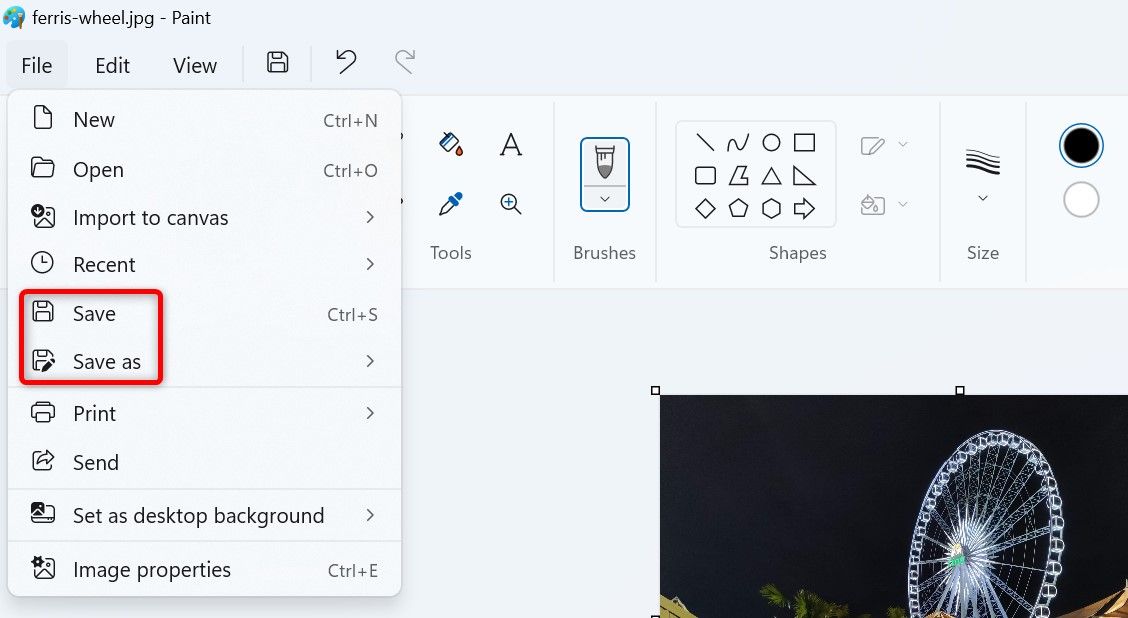
When you’ve finished rotating the image, save it. To overwrite the original image with the rotated one, select File > Save from the menu bar or press Ctrl+S. To create a new copy of the image, select File > Save As and choose the preferred image format.
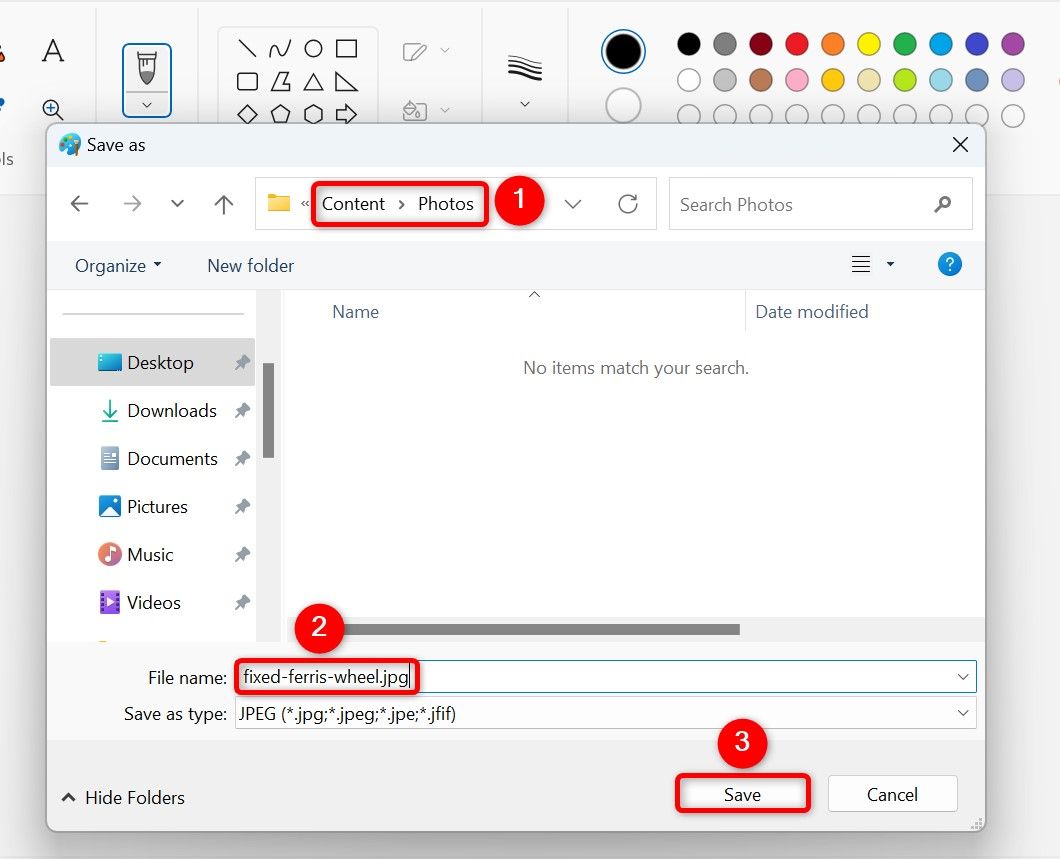
If you chose to make a copy of the image, select the folder where you want to save the image in the window that opens. Enter a name for the image in the “File Name” field and click “Save.”
Paint has saved your image.
And that’s how you change your photos’ orientation without using third-party apps on your Windows 11 PC. Enjoy!
Also read:
- [Updated] PictureWeaver Pro Online Illustration Hub
- Banishing Shadows: Ultimate Guide to Fixing Cyberpunk 2077 Screen Problems
- Creating a Personalized Chatbot: Integrating Your Unique Dataset with AI
- Effective Techniques to Resolve Constant Content Warning System Failures in PCs
- How to Solve Corsair iCUE Compatibility Problems on Windows 11
- In 2024, Easy Routine Reverse Playback on VLC Platform
- In 2024, Pokemon Go No GPS Signal? Heres Every Possible Solution On Samsung Galaxy A25 5G | Dr.fone
- Mastering Android's Picture-in-Picture Feature: A Comprehensive Guide
- MP3プレイヤーが機能しなくなったら、Android 202 Cufflinks24でこれを行う -対策ガイド
- Resolved: P3S PC Game Crashes No More
- Roblox Mute Mystery Unraveled: Troubleshooting No Sound Issues in W11/W10
- Smooth Gaming Experience: Overcoming the NBA 2K21 PC Crash Challenge
- Solved! How to Fix 'Star Wars Jedi: Fallen Order' PC Game Freezes and Crashes
- Unlock the Power of Contactless Payments: How to Activate Apple Pay on an Apple Watch
- Unmasking Bogus Antivirus Alerts - Learn 5 Effective Defense Tactics
- Title: Mastering Image Orientation: Tips for Easy Rotating Photos on Windows 11
- Author: Daniel
- Created at : 2024-11-29 16:45:35
- Updated at : 2024-12-06 17:20:06
- Link: https://win-answers.techidaily.com/mastering-image-orientation-tips-for-easy-rotating-photos-on-windows-11/
- License: This work is licensed under CC BY-NC-SA 4.0.