Fixing the Dreaded SteamVR Error Code 308: A Comprehensive Guide

Mastering SteamVR: Overcoming the Challenge of Error 3 to Ensure a Seamless VR Experience
You bought the Vive for fun but when you start SteamVR, you received the error message “Error 308”. It’s not a pleasant experience. Don’t worry, you’re not alone. This post will show you how to fix the error and bring you back to the game.
Try these fixes
You don’t have to try them all; just work your way down the list until you find the one that works for you.
- Start Steam as administrator
- End Steam and SteamVR tasks
- Fix SteamVR installation path
- Update your driver
- Reinstall SteamVR
Fix 1: Start Steam as administrator
Run Steam as administrator is a simple but effective fix. This fix has helped many users fix their problems.
HOW : Right-click on Steam and chooseRun as administrator .

Fix 2: End Steam and SteamVR tasks
End Steam and SteamVR tasks then reboot them sound cliche but quite effective. It’s no harm to try such a fix.
- PressCtrl + Shift + Esc together to open the Task Manager.
- Choose a Steam task and clickEnd task . Repeat this process until you end all Steam related processes.

- Restart Steam and SteamVR to check.
Fix 3: Fix SteamVR installation path
When Steam was installed in a non-default folder and your SteamVR configuration path may be related to a non-existent path. This will cause you meet the SteamVR error 308. You can fix it by correcting the installation path.
- Close Steam and SteamVR completely.
- Navigate to “…/username/AppData/Local/openvr” and delete the “openvr.vrpath”.
OR
Navigate to “…Steam/steamapps/common/SteamVR/bin/win64” and runvrpathtreg to fix the path. - Reboot Steam and SteamVR.
Fix 4: Update your driver
The missing or outdated device drivers in your computer can result in issues. To rule it out as the cause for your problem, you should verify that your drivers are up to date, and update those that aren’t.
There are two ways you can update your driver: manually and automatically.
Option 1 – Download and install the driver manually
You can download drivers from the manufacturer official website. Search for the model you have and find the correct driver that suits your specific operating system. Then download the driver manually.
Option 2 – Automatically update drivers
If you don’t have time or patience to manually update your drivers, you can do it automatically with Driver Easy .
Driver Easy will automatically recognize your system and find the correct drivers for it. You don’t need to know exactly what system your computer is running, you don’t need to risk downloading and installing the wrong driver, and you don’t need to worry about making a mistake when installing.
You can update your drivers automatically with either the FREE or the Pro version of Driver Easy. But with the Pro version it takes just 2 clicks (and you get full support and a 30-day money back guarantee ):
- Download and install Driver Easy.
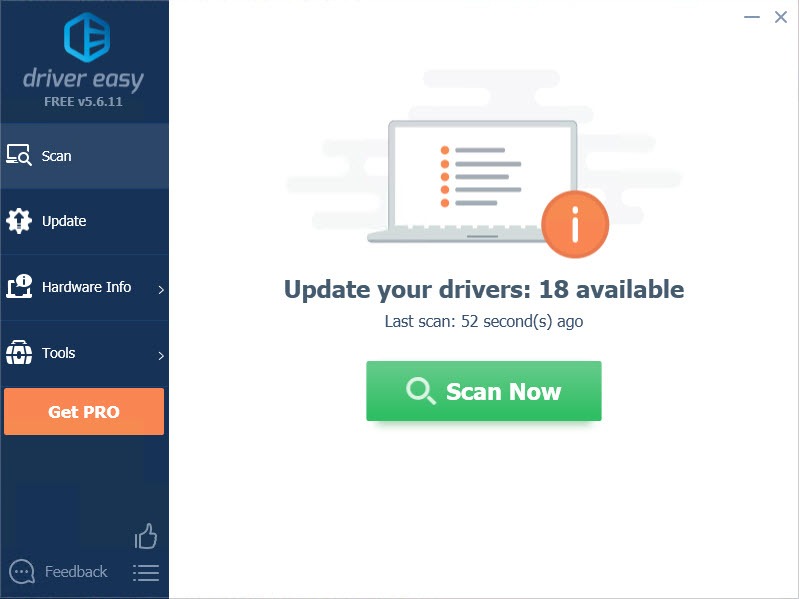
- Run Driver Easy and click the Scan Now button. Driver Easy will then scan your computer and detect any problem drivers.

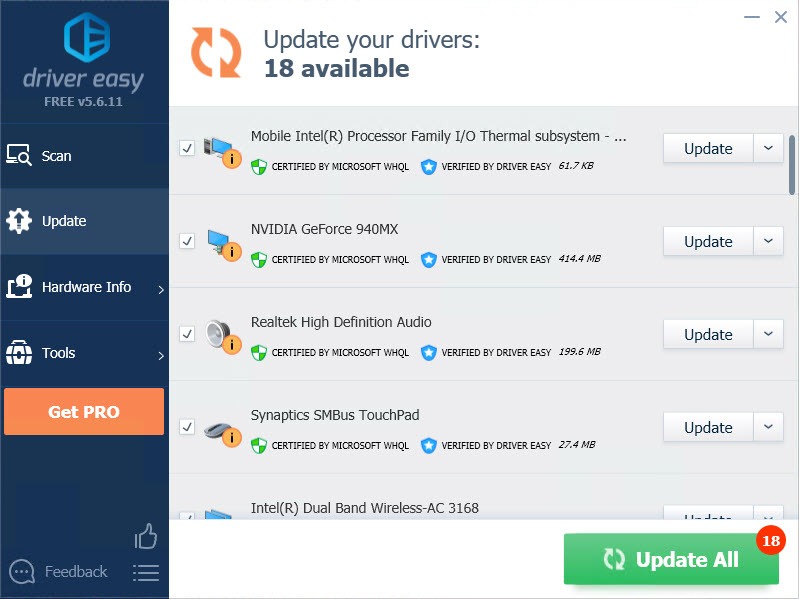
- Click the Update button next to the flagged driver to automatically download the correct version of that driver, then you can manually install it (you can do this with the FREE version).
Or click Update All to automatically download and install the correct version of all the drivers that are missing or out of date on your system. (This requires the Pro version which comes with full support and a 30-day money back guarantee. You’ll be prompted to upgrade when you click Update All.)
Note : If you have any problems while using Driver Easy, feel free to contact our support team at [email protected] .
Be sure to attach the URL of this article if needed for more expedient and efficient guidance.
Fix 5: Reinstall SteamVR
If no fix works, reinstall SteamVR is a good option to try. When the installation files are corrupted or incomplete, the problem may appear and cause trouble.
- Press theWindows logo key + R together to open the Run box.
- Typeappwiz.cpl and press the Enter key.
 The BootIt Collection covers multi-booting, partitioning, and disk imaging on traditional PC’s using the standard BIOS and newer PC’s using UEFI. The collection includes BootIt Bare Metal (BIBM) for standard BIOS systems and BootIt UEFI (BIU) for UEFI system.

The BootIt Collection covers multi-booting, partitioning, and disk imaging on traditional PC’s using the standard BIOS and newer PC’s using UEFI. The collection includes BootIt Bare Metal (BIBM) for standard BIOS systems and BootIt UEFI (BIU) for UEFI system.
 - Right-click onSteamVR and clickUninstall .
 PCDJ DEX 3 for Windows & MAC is the total entertainment DJ software solution, offering audio, video, and karaoke mixing ability. Automatic beat-sync, smart looping, 4 decks, DJ MIDI controller support, Karaoke Streaming and much more.
DEX 3 meets the demands of today’s versatile DJ, without compromise!
DEX 3 (Audio, Video and Karaoke Mixing Software for Windows/MAC | 3 Activations and Free Updates)
- Go toSteam official website to download the latest version.
- Install and run the program to check.
So there you have fixes for SteamVR error 308 . If no fixes could help you fix the problem, you need to contact the customer service.
If you have any questions or suggestions, feel free to leave us a comment below.
- Title: Fixing the Dreaded SteamVR Error Code 308: A Comprehensive Guide
- Author: Daniel
- Created at : 2024-08-19 01:23:19
- Updated at : 2024-08-20 01:23:19
- Link: https://win-answers.techidaily.com/fixing-the-dreaded-steamvr-error-code-308-a-comprehensive-guide/
- License: This work is licensed under CC BY-NC-SA 4.0.


 Forex Robotron Gold Package

 The BootIt Collection covers multi-booting, partitioning, and disk imaging on traditional PC’s using the standard BIOS and newer PC’s using UEFI. The collection includes BootIt Bare Metal (BIBM) for standard BIOS systems and BootIt UEFI (BIU) for UEFI system.
  PCDJ DEX 3 for Windows & MAC is the total entertainment DJ software solution, offering audio, video, and karaoke mixing ability. Automatic beat-sync, smart looping, 4 decks, DJ MIDI controller support, Karaoke Streaming and much more.